This block design has been around for ages and there are a lot of different tutorials for this on the web. I’m providing this tutorial to show how I make my personal take on it. I did not invent this block.
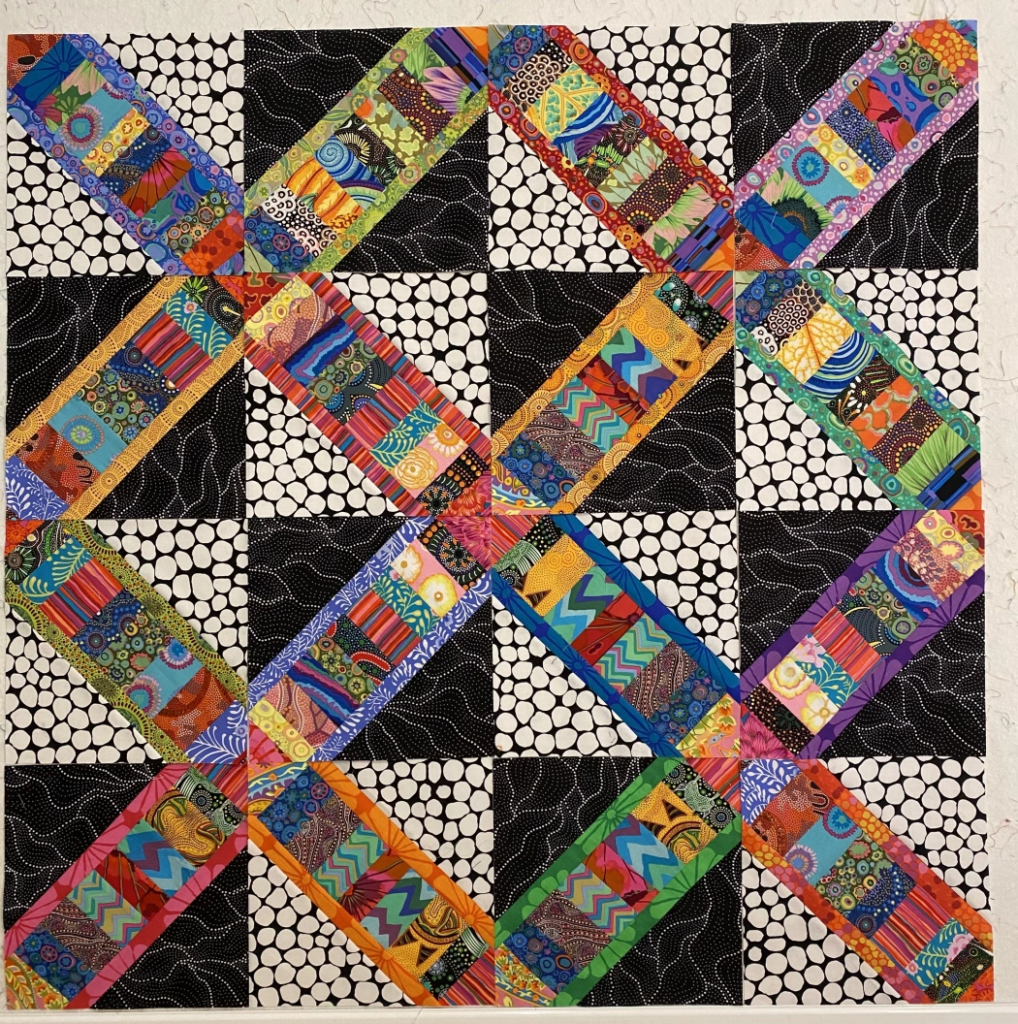
I was inspired to make this quilt a few months ago when I made small versions of this block for pin cushions and four of them ended up together on my cutting table… and an idea was born!
Please feel free to use this tutorial and share it with your quilting friends. All I ask is that you give me credit when posting about it on social media or in other mass communications.
My blocks measure 9.5 inches and will finish at 9 inches
There are three elements to each block.
Block center – made from scrap strips
Sashing strips — made from prints that read as solids.
Corner triangles — I used black and white fabrics. Half the blocks have white corners, half have black corners.

Selecting Fabrics
Center strips. Scrap strips of varying width (1.5 inches to 2.5 inches) and varying lengths (at least the width of the finished strip you want.) My center strips are cut to 3.5 inches wide. I used Kaffe Fassett Collective and Australian Aboriginal fabric scraps. I press and organize my scraps before sitting down to sew.

Sashing for center strips: Fabric prints that read as solids. They have pattern, but from a distance read as a solid. If I have enough duplicate pieces in my scrap bin, I’ll use scraps. But for most of these blocks I cut the sashing fabrics from yardage.
Here’s some of the fabrics I’m using.

Corners for blocks: The black fabric I used is an Australian Aboriginal design from M&S Textiles called Land of Utopia. The “white” fabric is Brandon Mably’s jumble in white, a Kaffe Fassett Collective fabric.

You can use any black and white fabrics you want for the corners. You could use solid colors for the corner triangles, or all different colors of polka dots, or a selection of different black and white prints for variety.
For the strips and sashing, you can select scraps that are more color coordinated, like one block could be all green scraps, and another could be all red scraps, etc… You could use a common fabric for the strips along the center piece… maybe a black and white stripe, or a common color or common print for all the blocks.
Making the Center of the block
I make my centers by sewing strip sets that I can cut multiple block centers from. You could certainly make them one at a time if you want to use up your smaller scraps. My strips vary in length… anywhere from 12 inches to 20 inches or so.

Decide how wide you want your center of your block to be. Mine are 3.5 inches. I would love to see this made with wider center sections. 5 inches? 6 inches?
Calculate how long the center needs to be… measure the diagonal of the square and add one inch. I make mine around 15 inches long for my 9.5 inch block.

Better to have a little more than you need, rather than your strip set being too short.
I pair up three or four sets of scrap strips before I sit down to sew. I select a variety of colors for each strip set and try not to put like colors next to each other. The width of the strips varies and I select enough strips to add up to approximately 15 inches tall. I can always add more if I don’t have enough.

Then I sew the multiple strip sets before I get up to press them.

Once I have three or for strip sets sewn I press them all at the same time, square up one edge of each strip set, then cut them to my 3.5 inches in width starting with that squared edge.


Whatever is left over at the end is tossed into my crumb scrap basket.
Adding sashing to center of block
My sashing strips are cut 1-3/4 inches wide and 11 inches long. Calculate how long your strips need to be based on your block size.
Place your square ruler on top of your center strip with the strip centered between two corners. Measure the line where the side of the ruler intersects with the edges of the center section.

For my 9.5 inch blocks this measures around 9 inches. I cut my sashing strips to 11 inches long. Basically, I add about two inches to my measurement so I have some leeway when squaring up my blocks. I only have to calculate this once. There’s no need to do it with each block.
I’ve been using strips cut from yardage, or scraps if I have duplicates that are wide enough. If you’re making a different size block, you can calculate using the same method. Just measure using your block size.
Lay your sashing strips along either edge of the center piece, centering it as best you can. I just make sure that the ends of the sashing strips are each the same distance away from the ends of the center piece.

I lay both strips on at the same time and then sew both seams.

Sew a 1/4 inch seam along each edge, then press the seam allowance toward the sashing.
Trim the sashing pieces to 1 inch wide

Here’s the center piece with both sashing pieces trimmed to 1 inch.

I trim my sashing to 1 inch rather than cut it to that size initially because I get a more precise piece to sew the triangles to. This is a step you could skip if you feel your piecing is precise enough. Mine is not!
Adding Corner Triangles
Calculate the size of square you need to cut into two triangles. For my 9.5 inch block this measures about 6 inches. I cut my squares 7.5 inches. This gives me enough room to square up my blocks with about 1/4 inch to spare all the way around the block.

Since these squares will be cut in half along the diagonal, thus exposing a bias edge, I press my squares using Best Press to help keep them from stretching as I work with them. You could use starch or other spray stabilizers that you prefer. You don’t have to use stabilizer.
Cut your squares in half along the diagonal.

Mark the center of each side of the sashing on your center strip by folding it in half and finger pressing the crease. Do the same for the two triangles for this block.

Line up two pieces and pin them together. Do this to both sides. The diagonal cut for these corners is on the bias, so be very careful handling these triangles so you don’t stretch that edge.
When you pin the triangles to the sashing pieces the triangles will overlap each other so you want to make sure you fold the corner of the first one down before pinning the second one on. I fold it down and gently finger press, then pin the second triangle in place. Pinning helps you prevent stretching that bias edge.


Sew these pieces together, then press with the seam allowance toward the corner triangles.
Squaring up your blocks
I’m using a 9.5 inch square ruler to square up my blocks. You just want to make sure that you keep the corners of the square ruler lined up with the center of the strip. You can use a pen to mark the center of the end of each strip so you have a visual marker. I’ve had good luck just eye balling it to keep it centered.


I remove a little more than 1/4 inch of excess fabric all the way around the block. This is acceptable waste for me. I like having a little bit of room when I square up.

There are lots of videos on YouTube on how to square up quilt blocks so I won’t explain that here.
It’s not a bad idea to make one block to make sure all your measurements and calculations work. I did that and made several adjustments to subsequent blocks to make construction and trimming more efficient.
Now make 90 more blocks!!!
Source: https://agilejack1.com/2024/01/06/agilejacks-fresh-start-quilt-block-tutorial/